Day 11: Sweet Sketches – Drawing Cherries for Realism

Grand and glorious rising, art fam!

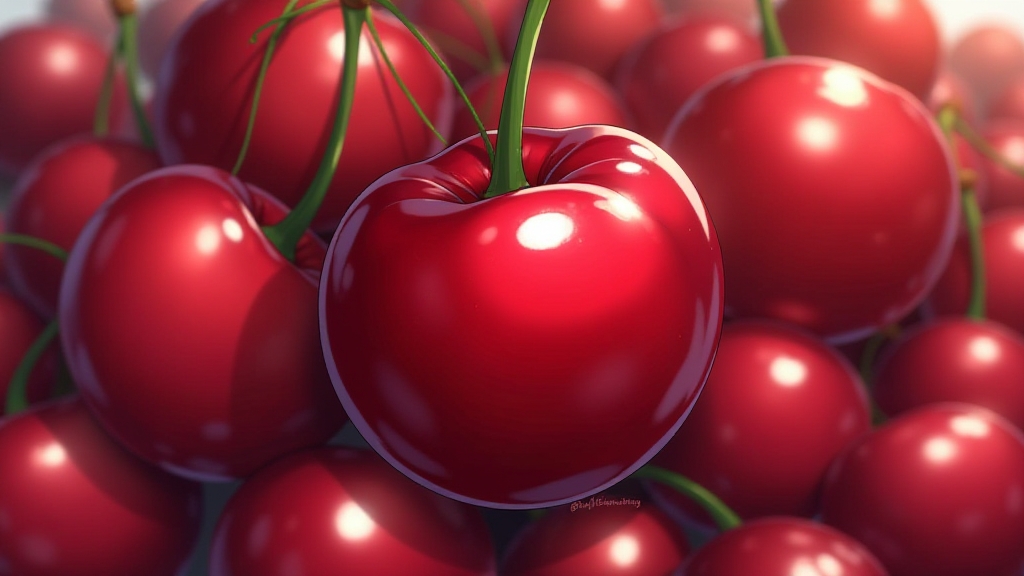
Welcome to Day 11 of the Kickstart Your Creativity course. Today, we’re diving into the sweet world of cherries. 🍒 These juicy fruits are the perfect challenge to sharpen your shading and gradient techniques while exploring light and reflection.

Why Cherries?
Cherries may seem simple, but they’re a fantastic subject to practice creating smooth textures and realistic highlights. Each curve and surface reflects light differently, making this exercise ideal for beginners and seasoned artists alike.

Tips for Drawing Cherries:

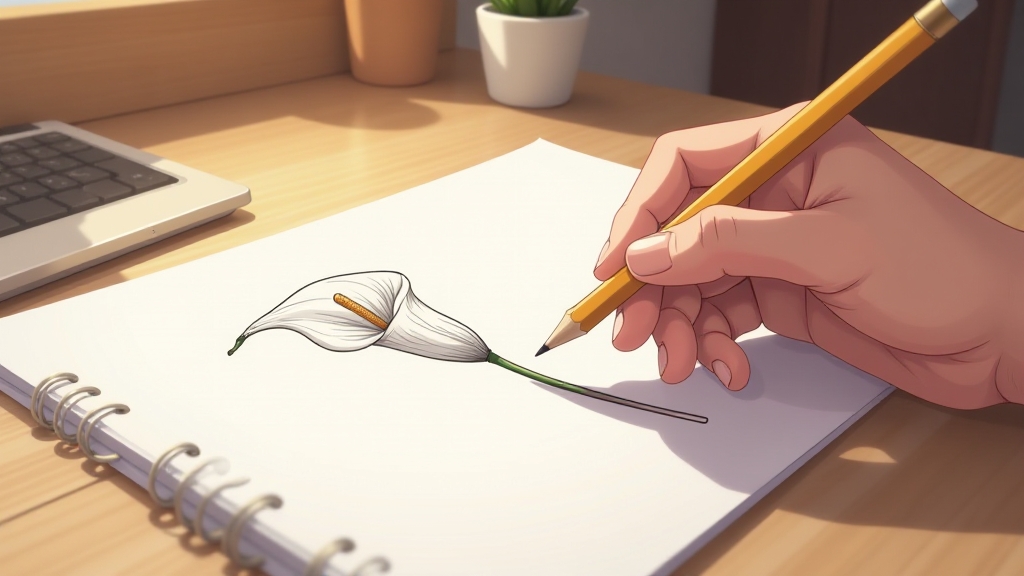
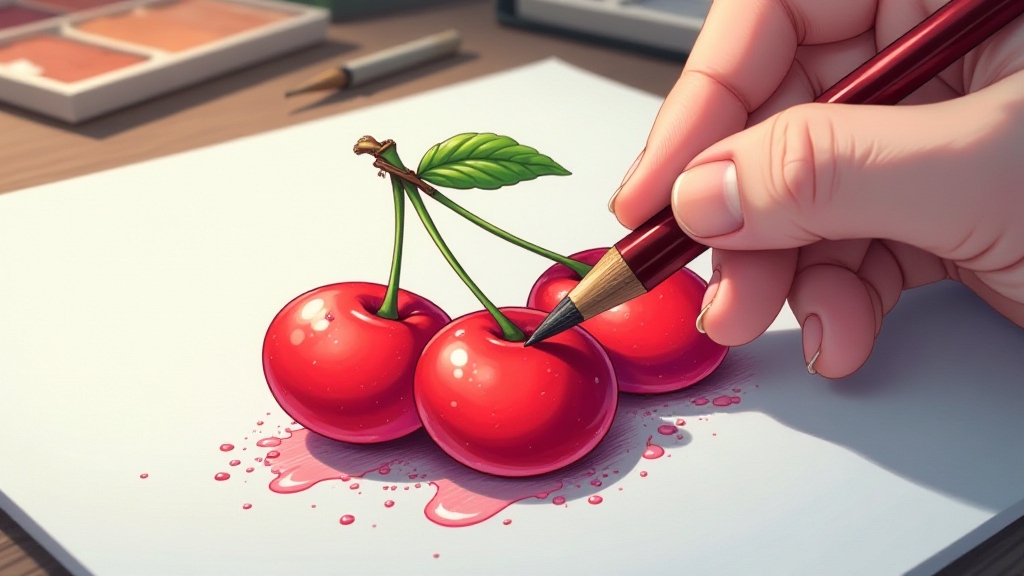
  1. Outline First: Sketch two connected circles for the cherries and a thin line for the stem. Keep it light and simple.
  2. Layer Your Shading: Build up shadows in layers, using smooth pencil strokes for a polished finish.
  3. Add Highlights: Use an eraser to lift graphite or leave intentional white spaces for a glossy, lifelike effect.
  4. Details in the Stem: Don’t overlook the stem! A few subtle lines will make it look real.

Keep Going, You’re Doing Great!
Remember, practice isn’t about perfection—it’s about progress. Each day brings new skills, and today is no exception.

Check out my video tutorial on YouTube to see the process step by step, and don’t forget to visit TilaTheArtist.com for more inspiration, blogs, and resources.

Let’s keep the creativity flowing. Like, share, and subscribe to help me reach 1,000 followers. Together, we’re building an amazing art community! 🎨✨

Day 10: Drawing a Blooming Calla Lily – A Celebration of Growth and Beauty

A calla lily isn’t just a flower—it’s a symbol of growth, beauty, and transformation. On Day 10 of Kickstart Your Creativity, we’re focusing on capturing the elegant curves and soft petals of this timeless bloom.

Drawing a calla lily is a wonderful exercise for any artist, whether you’re a beginner or a seasoned pro. It allows you to practice delicate lines, explore shading techniques, and create depth that brings your art to life.

More importantly, this exercise is a reminder that creativity unfolds like a flower—it’s a gradual process. Every pencil stroke represents a step forward, a new layer of growth in your artistic journey.

As you draw today, take a moment to reflect. How has your creativity bloomed over the past 10 days? Each challenge builds on the last, and with every piece, you’re becoming more confident and expressive.

I’d love to see your blooming creations! Share your art with the hashtag #DrawWithTila and tag me on social media. Let’s inspire each other and continue growing this supportive art community.

Visit Tilatheartist.com for more daily inspiration, tips, and blog posts. Together, we’re making creativity flourish—one pencil stroke at a time.

Day 8: Drawing a Feather – Unlocking Your Creative Potential

Grand and glorious rising, art fam! We’re on Day 8 of our 31 Days to Artistic Breakthroughs journey, and today we’re diving into the art of drawing a feather. Feathers may seem simple, but they’re packed with learning potential, helping you hone your skills in everything from delicate shading to capturing the finest details.
Why Draw a Feather?
Feathers are perfect for practicing light and shadow, which is essential in bringing depth to your drawings. As you focus on the texture of the feather and how light plays off the surface, you’ll start to notice subtle nuances that will elevate your work to the next level. Drawing a feather helps you understand natural texture and the beauty of simplicity in nature.
Tips for Drawing Feathers:
Observe the Light: Notice how the light catches the edges and curves of the feather.
Start with Soft Strokes: Use light pencil strokes to sketch out the basic form of the feather.
Build Up Layers: Gradually add layers to create depth, using darker tones where shadows fall.
Practice Shading: Pay close attention to the soft transitions between light and dark areas.
This exercise will not only improve your technical skills but also enhance your creative confidence. So, grab your pencil, take a deep breath, and let’s make some artistic magic happen!
To dive deeper into today’s lesson and more tips, head over to Tilatheartist.com and read our detailed blog posts. Join our community of passionate artists and start your creative breakthrough now!

Mastering Draped Cloth: A Journey Through Light, Shadow, and Form

Hello, creative souls!

Welcome to Day 7 of the Kickstart Your Creativity course with me, Tila the Artist. Today, we’re tackling a beautiful yet challenging subject: draped cloth. This exercise teaches you to see the world in terms of shapes, lights, and shadows—essential skills for every artist.

Why Draped Cloth?
Fabric folds teach us about depth and texture. By observing how the material bends, stretches, and interacts with light, we can create drawings that feel tangible and alive. This exercise builds patience, focus, and the ability to truly observe.

How to Start:

  1. Setup: Choose a piece of fabric and drape it over an object. Observe the highlights, shadows, and mid-tones.
  2. Outline: Sketch the overall shape of the cloth and its folds with light, confident strokes.
  3. Shading: Focus on the interplay of light and shadow. Use blending techniques to create soft transitions.
  4. Details: Add texture by emphasizing specific areas, such as crisp folds or frayed edges.

Remember, every line, shadow, and highlight tells a story. This is your opportunity to bring elegance and depth to your art. Don’t forget to share your work using the hashtag #TilaTheArtist. And while you’re here, explore more tips and challenges at Tilatheartist.com.

Let’s create something extraordinary today!

Day 6: Stack Your Creativity—Drawing a Stack of Books!

Welcome to Day 6 of the Kickstart Your Creativity challenge! If you’ve been following along, you’ve already begun building a strong foundation in drawing. Today, we’re diving into a timeless subject that combines structure, storytelling, and symbolism: a stack of books.

Books are more than just objects; they’re vessels of knowledge, imagination, and growth. In art, they offer an excellent opportunity to practice perspective, balance, and shading techniques while allowing room for personal touches that bring your story to life.


Why Draw a Stack of Books?

Drawing a stack of books helps you develop essential artistic skills:

  1. Perspective: Understanding angles and alignment is key when drawing objects stacked on top of each other.
  2. Details: Adding elements like book titles, textures, and bookmarks refines your attention to detail.
  3. Shading and Depth: Mastering light and shadows creates realistic, visually engaging drawings.

Plus, books are a metaphor for personal and creative growth. As you draw, consider how this stack represents your journey as an artist—layer by layer, you’re building your skills.


Step-by-Step Guide to Drawing a Stack of Books

Here’s a quick roadmap to guide you:

  1. Sketch the Base Shapes: Start with simple rectangles to form the books’ basic structure. Adjust the angles to make the stack dynamic.
  2. Add Details: Bring your stack to life with creative book titles, textured covers, and even bookmarks peeking out.
  3. Shade for Realism: Focus on the shadows between books and add highlights to mimic light hitting the surfaces. This step is where your drawing comes alive!

Engage with Your Art Journey

Remember, drawing is about more than just technical skills—it’s about finding joy in the process. As you work on your stack of books, think about your favorite stories or the lessons you’ve learned so far in this challenge.

Share your progress! Tag me on social media with #KickstartYourCreativity. I’d love to see your unique take on today’s theme.


Extra Inspiration at TilatheArtist.com

Looking for more tips and in-depth guidance? Visit Tila the Artist on IG, TicToc and YT to explore detailed exclusive insights to help you grow as an artist.


Let’s Grow Together

Drawing a stack of books is more than an exercise; it’s a celebration of your creative journey. Every line and shadow you draw builds your confidence and skill as an artist.

Don’t forget to like, comment, and share this post to inspire others to join our artistic community. Together, we’re stacking up our creative wins—one drawing at a time.

Let’s keep growing, creating, and inspiring. See you tomorrow for Day 7!

Day 5: The Art of Drawing a Mug | Kickstart Your Creativity Challenge

Grand rising, Art Fam! 🌟 Welcome to Day 5 of our ‘Kickstart Your Creativity’ challenge, where we’re drawing an everyday object: a mug. This might seem simple at first glance, but the mug’s contours, perspective, and shadows make it a fun and skill-building exercise.

Start with the basics—draw an oval for the rim, then extend it into a cylinder for the body. Don’t forget the handle! Its curves add a unique touch and test your ability to draw connected shapes. Once your outline is complete, focus on shading to create depth and realism.

Why a Mug?
The mug is a perfect subject to practice form, perspective, and light. It’s a great way to challenge yourself while working on the essentials.

💡 Tila’s Tip: Use soft, light strokes to map out your lines before committing to them. This way, you can refine your drawing as you go.

We’d love to see your progress! Share your sketches with the hashtag #KickstartYourCreativity and tag @Tilatheartist. Don’t forget to leave a comment—let us know your favorite drink to pair with your art sessions.

📖 Want more inspiration? Visit @tilatheartist on Tic Toc, YouTube, or Instagram for additional tips and insights. Together, let’s keep growing and creating!”

Day 4: Nature’s Beauty – Drawing a Plant Leaf 🌿

Grand Rising, Art Fam! Tila the Artist here, welcoming you to Day 4 of the ‘Kickstart Your Creativity’ course. Today, we’re turning to nature for inspiration as we draw a plant leaf.

There’s something magical about capturing the delicate details of a leaf—the veins, the curves, and the way light and shadow interact. This exercise isn’t just about drawing; it’s about observing and connecting with the world around us.

Why Focus on a Leaf?

Drawing natural forms like leaves helps you develop your observation and shading skills. It’s an opportunity to practice creating soft textures and realistic details while celebrating the beauty of simplicity.

Tips for Your Leaf Drawing:

  1. Start with the Outline: Lightly sketch the shape of the leaf, focusing on its unique contours.
  2. Add the Veins: Observe the vein patterns and gently map them out.
  3. Shade for Depth: Use your pencil to add shading, emphasizing where light hits and shadows form.

Share Your Progress!

I’d love to see your work! Post your sketches with the hashtag #KickstartCreativity and tag me @TilatheArtist. Let’s cheer each other on and keep this creative momentum going!

Remember, this journey is about growth, not perfection. Every line you draw is a step closer to mastering your craft.

Let’s sketch the beauty of nature together and kickstart creativity one stroke at a time!

Day 3: Mastering the Cube – Building Artistic Confidence

As we continue our ‘Kickstart Your Creativity’ journey, Day 3 brings us to a timeless lesson—the cube. While it may seem simple at first glance, the cube holds profound importance for any artist looking to grow.

The cube is more than just a basic shape; it’s a gateway to understanding form, perspective, and dimension. When you learn to sketch and shade a cube, you’re laying the foundation for drawing more complex structures, from towering buildings to everyday objects.

We begin with a blank page and light pencil strokes, crafting clean lines to form the cube’s edges. Then, we dive into perspective, ensuring the angles align to create a believable 3D effect. Finally, shading brings it all together, transforming a flat sketch into a dynamic form full of depth and character.

The beauty of drawing a cube is in its simplicity. It teaches patience, precision, and the importance of subtle details. Each stroke reinforces the fundamentals of art, preparing you for the challenges of future projects.

Take a moment today to appreciate the process. Each line, shadow, and highlight you add is a step forward in your artistic journey. Whether you’re a beginner or an experienced creator revisiting the basics, the cube reminds us all of the joy in growth and learning.

Share your finished cube using #KickstartYourCreativity. Let’s celebrate progress and inspire each other to keep pushing forward. Together, we’re building a community of creators, one shape at a time!

Join me on IG, TicTok and YouTube for more helpful tips and tricks

Day 2: Embrace the Shine – Drawing a Shiny Sphere

Welcome to Day 2 of Kickstart Your Creativity! You’ve made it through your first day of sketching, and today we’re building on that foundation with a fun and rewarding challenge. Today, you’ll be drawing a shiny sphere. It’s simple, yet powerful in helping you understand light, shading, and the beauty of observation.

Starting Fresh – Embrace the New

Starting something new can feel intimidating, but remember, every great artist began exactly where you are right now. Embrace the process. With each stroke, you are not just creating a drawing; you’re training your mind to see the world through an artist’s eyes. The shiny sphere you’re about to draw is more than just an object—it’s a symbol of your journey, your progress, and your potential.

The Power of Observation

When drawing a shiny sphere, we focus on observing how light interacts with the object. This simple exercise teaches you the power of detail and depth. Notice the highlight where the light hits the surface. Feel the smooth transition of light to shadow as you shade the ball, creating a 3D effect. Each subtle detail adds dimension to your drawing.

This exercise also reinforces that there’s beauty in simplicity. The shine on the ball doesn’t just come from the surface; it’s created by the way you observe and express what’s around you. By focusing on one object, you begin to master the essential drawing techniques: contour, depth, and light.

A New Day, A New Challenge

Think of today’s drawing challenge as a fresh start—an opportunity to practice your skills and push yourself outside your comfort zone. It’s okay if your sphere doesn’t look perfect. What matters is the effort and dedication you put in, and the progress you make, no matter how small.

You’re not alone on this journey! As you sketch, take a moment to reflect on how far you’ve come since yesterday. You’re building a new habit, a new skill, and a new mindset. Keep going, and remember: growth happens with every line, every shade, and every detail you add to your artwork.

Day 1 – The Power of the Pencil: A Fresh Start

As we step into a new chapter, there’s an undeniable energy that comes with beginnings. Today is not just the first day of our Kickstart Your Creativity course; it’s a chance to embrace change, challenge ourselves, and unlock the boundless potential of artistic expression.

The pencil—a simple, unassuming tool—embodies this journey. With its sharpened tip, it reminds us that even the smallest point can create vast landscapes of imagination. With its eraser, it whispers, “Mistakes are part of the process, and starting over is always an option.”

Today, as you hold your pencil, take a moment to reflect on what brought you here. Is it a desire to learn, to grow, or to finally give voice to the images dancing in your mind? Whatever your reason, let it fuel your creativity.

Our first drawing exercise may seem straightforward: sketching a pencil. But this is no ordinary task. This is your opportunity to observe, to truly see, and to honor the simplicity of a tool that will become an extension of your hand over the next 31 days.

Remember, every artist begins with a single line. Let today be the start of your artistic transformation. Together, we’ll explore, create, and achieve breakthroughs you never thought possible.

So grab your pencil, and let’s get to work. The journey begins now!